
This is the perfect simple activity to do with a group of friends, little ones, or as a special gift for a loved one!
It’s always great to have fresh herbs to add onto your yummy meals, and these adorable pots would make the perfect home for your fresh herb garden. You can customize it any way you want with a label or your favorite quote. Let’s get started!
Supplies
-Herb/plant
–Foam brush
–White paint
–Terracotta pot
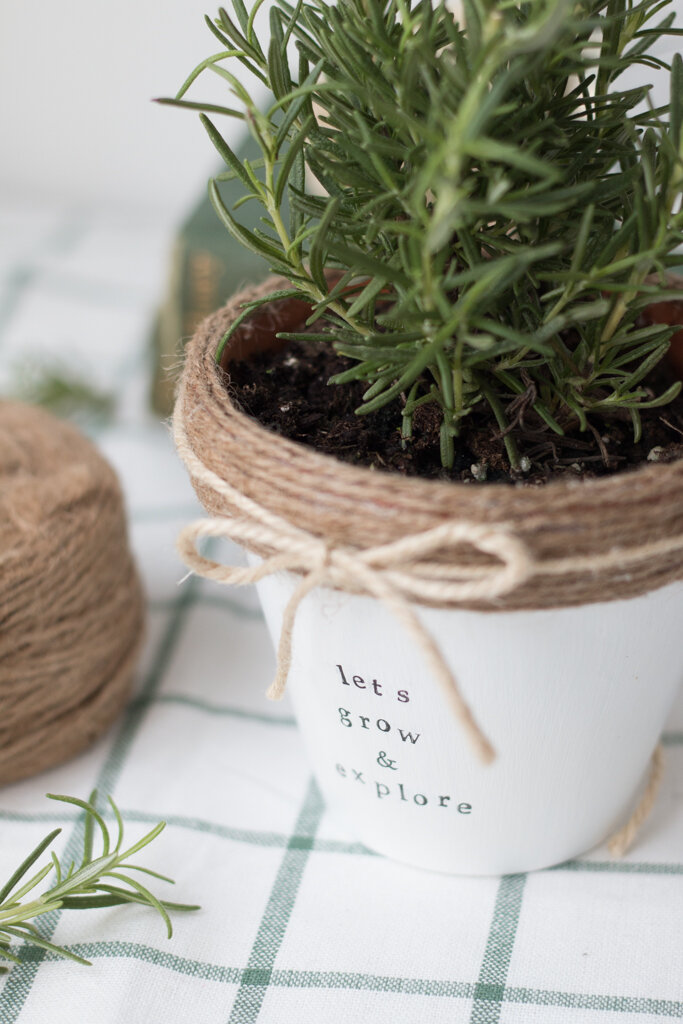
-Alphabet stamps
–Twine (optional)
–Glue gun (optional)
STEP 1:
Take a foam brush and begin covering your pot in white paint. Craft Smart acrylic paints are great because they are cheap and get the job done! Feel free to add as many layers of paint as you would like, but be sure to leave time for the paint to dry in between layers.
STEP 2:
Taking a glue gun and some jute twine, begin wrapping the top portion of the pot. Continue to add glue as you wrap until everything has been neatly covered. Next, take some jute twine in the color ivory and tie a bow on the top of your pot. This will add a nice, yet subtle, color contrast. This step is totally optional, you can also choose to leave your pot bare for a more natural look!
STEP 3:
This is the part where you can get a bit more creative! We chose to use some letter stamps and stamped on a simple quote, but you can use any stamps you may have. You can create your own quote, use different stamp patterns, or even add a pop of color. We like to use Stazon stamp pads since they are multi-surface. If you are doing a quote, the letters can get easily smudged by your fingers as you are stamping along, so be sure to give the ink some time to dry before going on to the next line.
If you’d like, you can add a cute little touch by stamping “handmade by (name)” on the bottom of the pot. It looks especially nice if you are giving this to someone as a gift!
STEP 4:
Now the only thing left to do is to pop your herb plant into your pot, and you’re done! We chose to put rosemary inside my pot, since it’s such a great addition to so many meals!

This tutorial and images were originally posted by Andrea on thebeautydojo.com.