
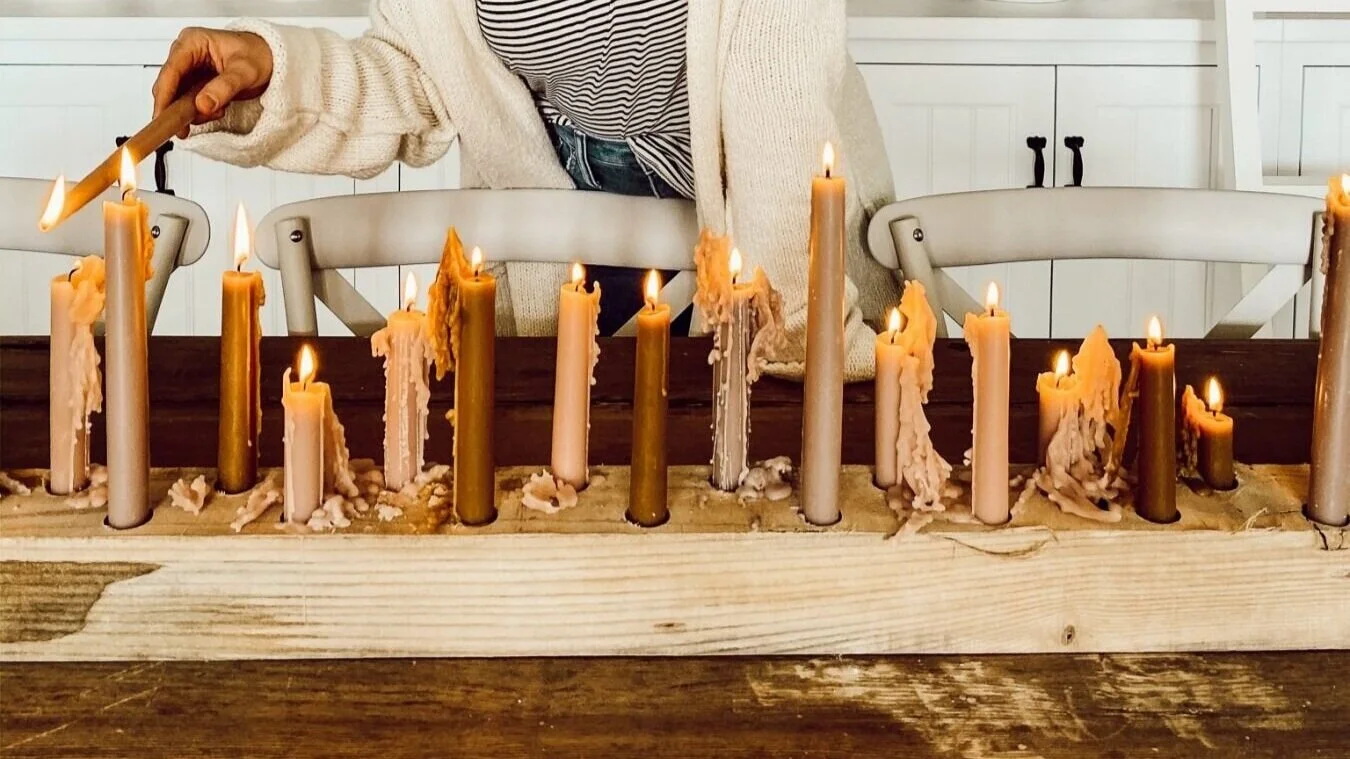
Image via Liz Marie Blog
This DIY Candlestick Holder centerpiece makes a huge statement when added to your dining room table but is actually super easy to make! The best part is that you can customize the size of the centerpiece to fit your dining room table. Once the candles start to melt they create this trickled wax look and add even more fun & texture to this already gorgeous centerpiece! By choosing warm neutral colors for your candles, this centerpiece can transition effortlessly from autumn into the holiday season. You can even swap the candles to a classic white to extend into the dreary winter months!
Overview

Image via Liz Marie Blog
The DIY is as easy as they come. Take a 4×4 of your choosing, we used White Ash for this project. We really like the natural look to this type of wood, and did not put any stain or sealer on it at all.
The next step is going to vary depending on table size and scale. We cut our 4×4 down to 52 inches in length. We felt this gave enough size and weight to the table top while also leaving room around the entire piece for table settings.
Lastly, its is time to drill the holes. The holes are 1 1/8 inch in diameter, and we used a stepper drill bit, so the hole tapers inward. You can also use a spade bit or forstner bit, but with a stepper bit the tapered hole will center and pinch together the base of the candle.
*A little tip to keeping your candles how you want them: Before placing them into a candle holder, heat up the bottom of the candle just a little bit to soften the wax, and install it into the candle holder. Hold it in place for a moment, to allow for the candle to harden back up and now it is practically form fitted in place.
Our Measurements
There are separate starting points for each side (right and left) of the 4×4, so we will focus on one at a time.
Left Side
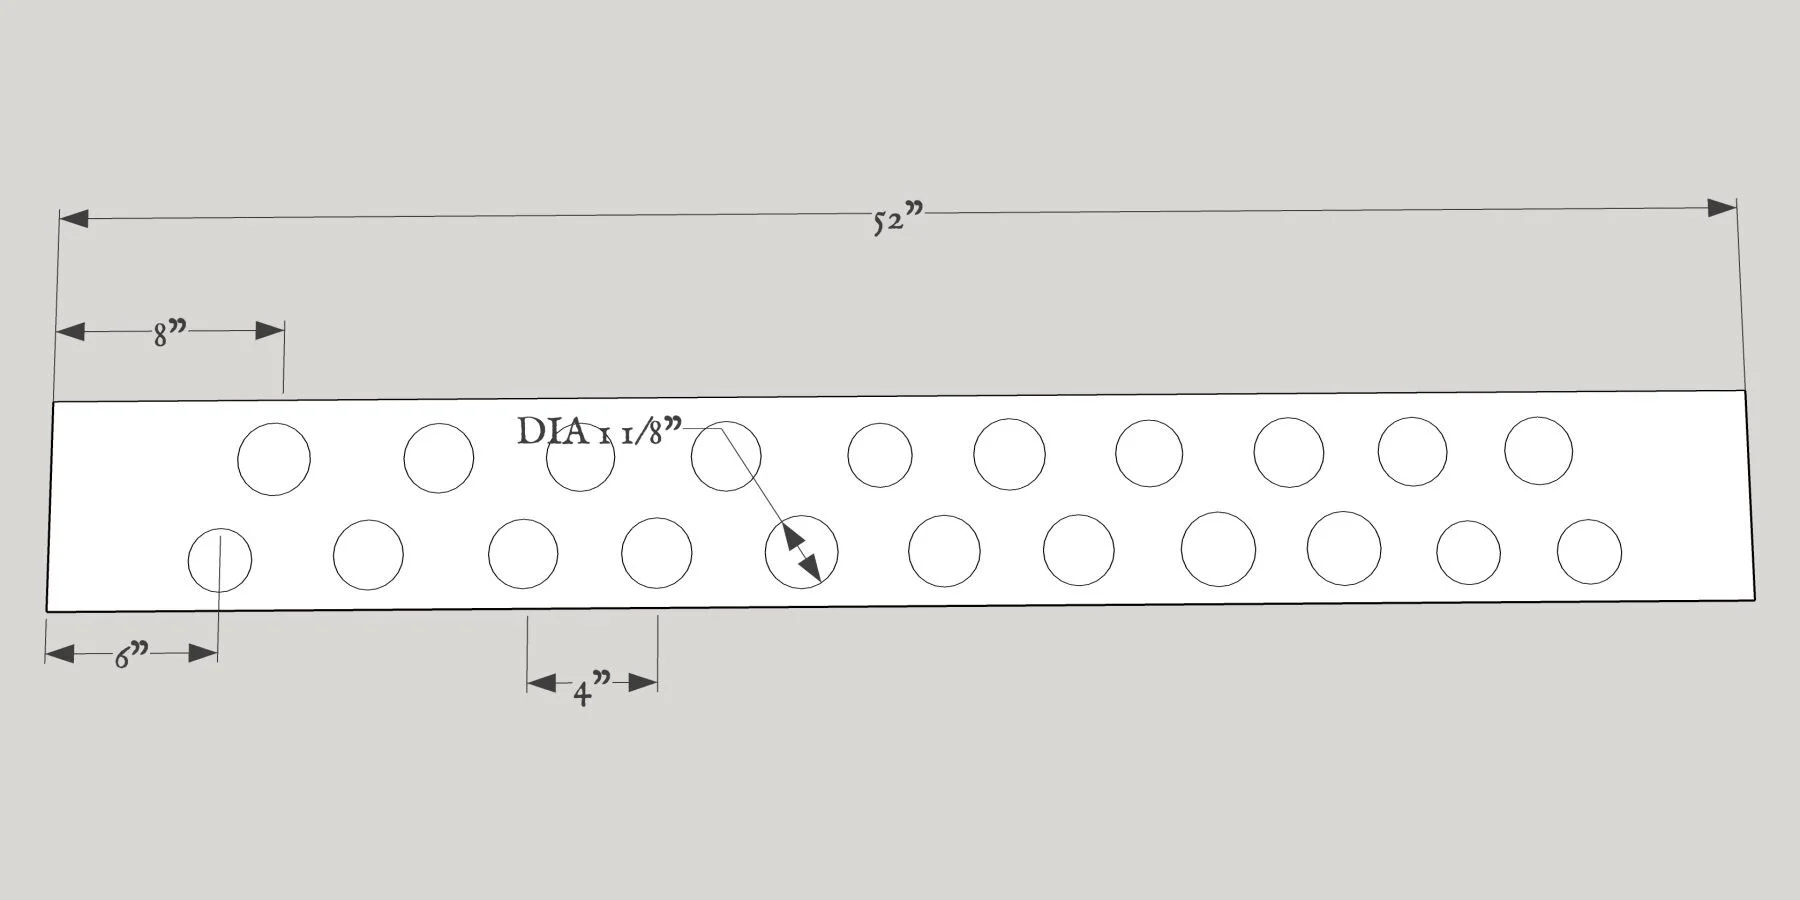
Image via Liz Marie Blog
There are going to be 11 holes in total if you are using the same length 4×4. Measure in 6 inches from each end of the 4×4. This is going to be the center of the first and last hole for this side. From here, the candle holes are located 4 inches from center to center. Measure all the way down until you hit the last hole. Once all are measured, measure inward from the edge, 13/16. This is going to be the center (drill point) for each of your candle holders.
Right Side
There are going to be 10 holes in total if you are using the same total length 4×4. Measure in 8 inches from each end of the 4×4. This is going to be the center of the first and last hole for this side. From here, the candle holes are located 4 inches from center to center. Measure all the way down until you hit the last hole. Once all are measured, measure inward from the edge, 13/16. This is going to be the center (drill point) for each of your candle holders.